Question: What says "Winter Wonderland" more than a snowflake?
Answer: Nothing.
I purchased a twig snowflake from Pottery Barn recently. It was expensive, of course, but I decided it was a necessary evil if I were going to pull off the Winter Wonderland theme inside and out of my house. The snowflake arrived, oddly enough, about the same time Winter Storm Albert did. Next thing you knew, our backyard was full of material for my very own twig snowflake.
As you can see, I had a lot of material to choose from. However, what I found to work best of all, were the little flexible twigs from birch trees. So if you want to save yourself roughly $45*, please... read on.
Materials:
1. Lots of twigs, preferably birch (because they are flexible and easy to work with).
2. Stem Wire (we used a 16 gauge, 18 inch type)
3. Floral Wire
4. Pruning shears to cut the tiwgs
5. Wire cutters to clip the wire
6. Sticky Tape (we used thick floral tape, but the silver duct variety would work as well)
7. A freak snowstorm that causes all of the trees to fall thus putting materials on every street corner.
Steps:
1. I started by stealing a number of birch limbs from one of my neighbors. To be clear, it wasn't really stealing, because they were out on the curb waiting to be made into wood chips.
2. Clip as many twigs as you can off of the limbs. For ease, you should plan to NOT use anything fatter than the cable connecting your mouse to your computer. I want to say that we needed to fill about 15 pint glasses full of twigs for the whole project.
3. Using the stem wire, create a circle, and tape the ends together.
4. Decide on the thickness of your flake, and start securing the twigs to your circle by wrapping them with floral wire.
5. Once your circle is complete it's time to work on the actual arms of the flake. Using the same tecnique, wire twigs down to the long stem wires. I used 4 pieces of stem wire for this step. Two pieces of which, I cut in half, to make them easy to secure to the circle in step 7.
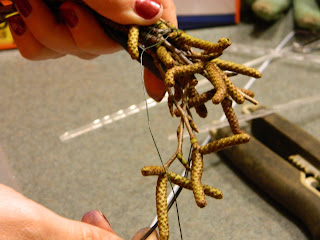
6. To add the little fingers, I simply wired a group of twigs together (no stem wire necessary here) and then broke them in half to create a V. Do this for each of the "arms".
 |
| They look like pitchforks! |
7. Starting with your two longest arms, write them to your circle with one arm on top and one on the bottom forming a cross.
8. Wire the little arms to the circle and to the big arms, creating a sort of star-burst.
9. (Optional) The PB snowflake has lights on it, and if you wanted to add them, this is when you would do it. Make sure that your male end of the plug is far enough away from the flake that you can actually plug it in when you are done!
10. (Optional) I added wired berries to my flake to give it a more woodsy feel. I did not add lights to mine because I didn't want them. Looks great doesn't it?
11. Reward yourself with candy! You did it again! (also, this was a time demanding project, so if you need more candy, you deserve it).
Total Cost: $0.00, I had everything already
Remaining Budget: $96.25
*You can't actually buy these from PB anymore, they are sold out.


Super adorable! I don't know- it seems hard, but you did a great job. Love the woodsy look of it.
ReplyDelete